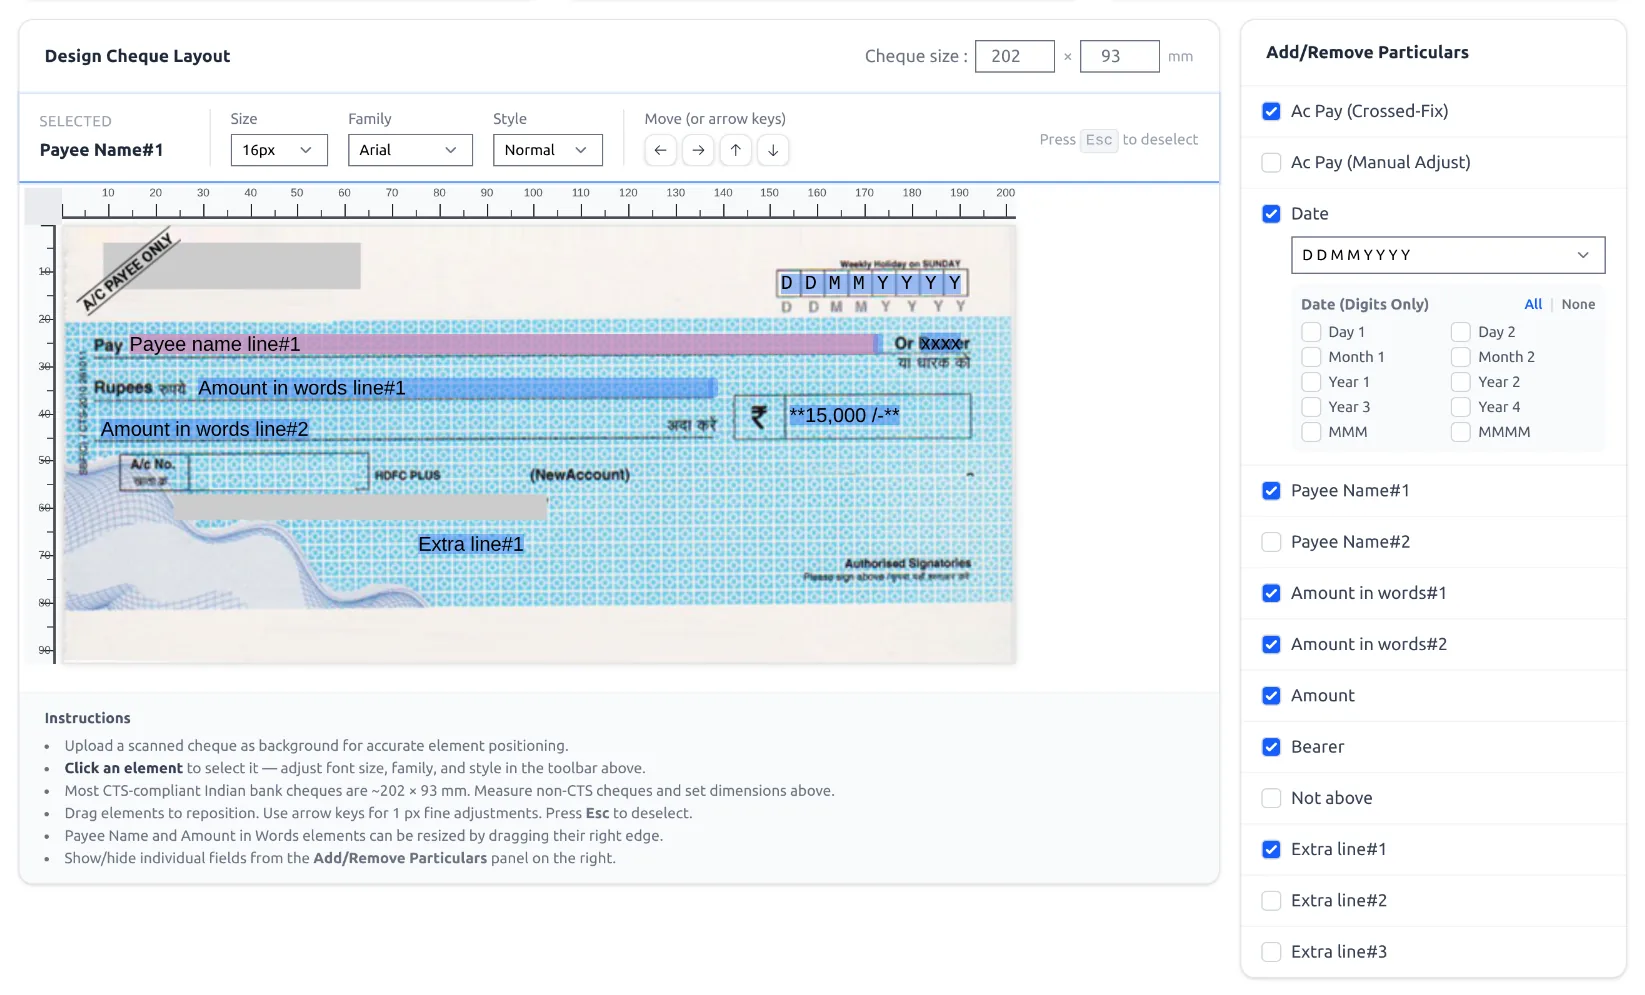
A layout defines where each field prints on your cheque. Create one per cheque design.
Create a layout
- Open Cheque Layouts → New Layout, give it a name (e.g. “HDFC Savings CTS”), and click Create & Edit Layout.
- In Upload Cheque Image, upload a scan/photo of your cheque and crop it — this becomes the background you align against.
- In Add/Remove Particulars, tick the fields you want (Date, Payee, Amount, Amount in words, A/C Payee, etc.).
- On the canvas, click a field to select it and drag it into position (arrow keys nudge 1px). Set its font, size and style.
- Click Save.
Shortcut: Click Import Cheque Layouts to copy a ready-made system layout into your account, then tweak it.
Next: set the date format and fine-tune with margins.
See it in the app